Thursday, December 14, 2017

Crafty Girl ideas for Planners

Hey there - have you gotten on the PLANNER rage - it’s basically a new creative way to keep a calendar and not the wall hanging kind. 

I personally have 3 or 5 going at one time. One to jot my crap in and serve as a reminder, one to decorate and share on social media, and one that is an actual wall calendar type for the family to see and a few others for back up (wink wink) 

Be warned it is so addicting and here see so so so many cool supplies in stores and even more online. I girl could go broke buying all the variations of goodies to add to your planner!!! 

The next couple of posts I will be sharing some super cheap but super cute planner supplies that won’t break the bank and if you get super good you can make some, package them and give hem to your fellow planner friends. 

Let’s get started - I spent 2 dollars on these supplies from the dollar tree and some gifted extra large paper clips plus I used felt I had on hand and my glue gun.


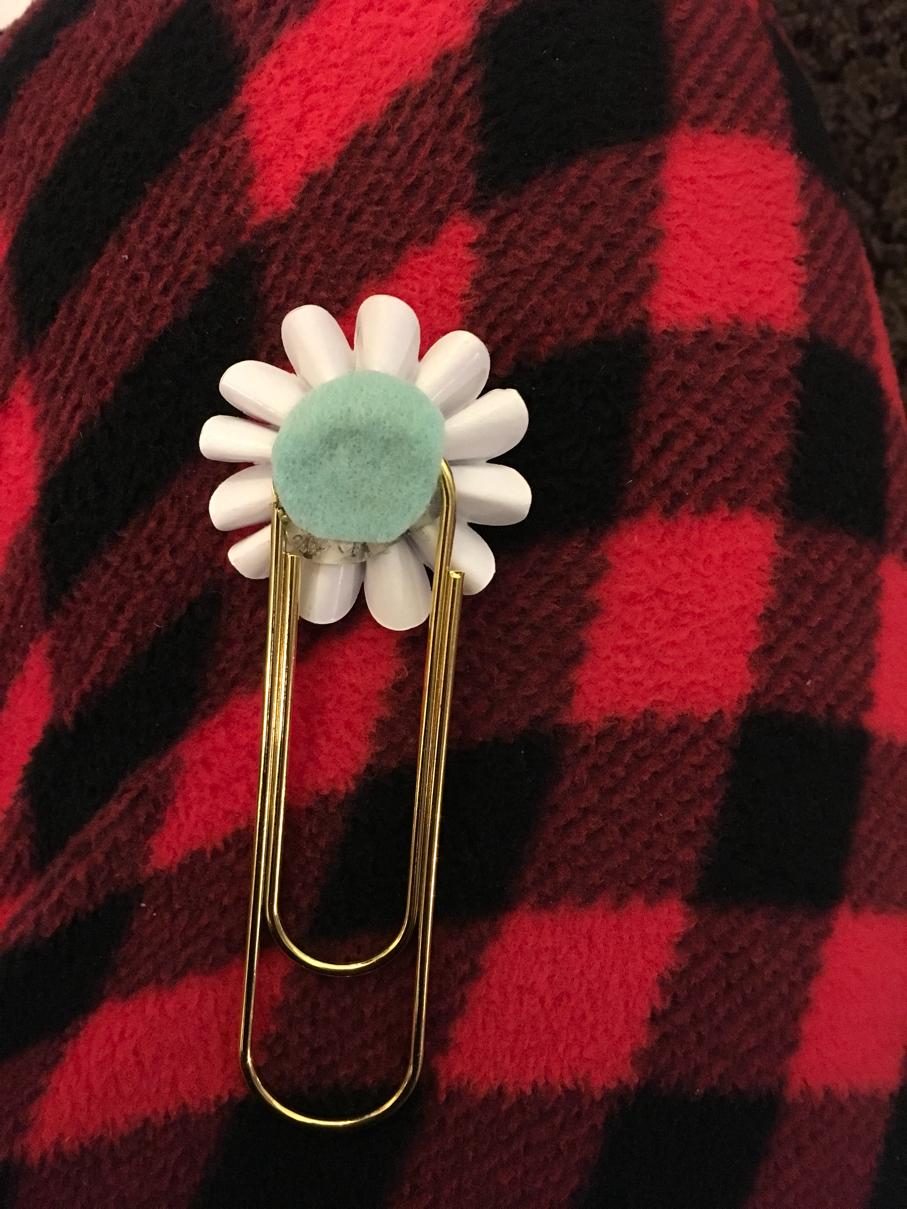
It’s pretty simple really just take off the rosette from the paper hanger and remove the pop dot and add some glue 


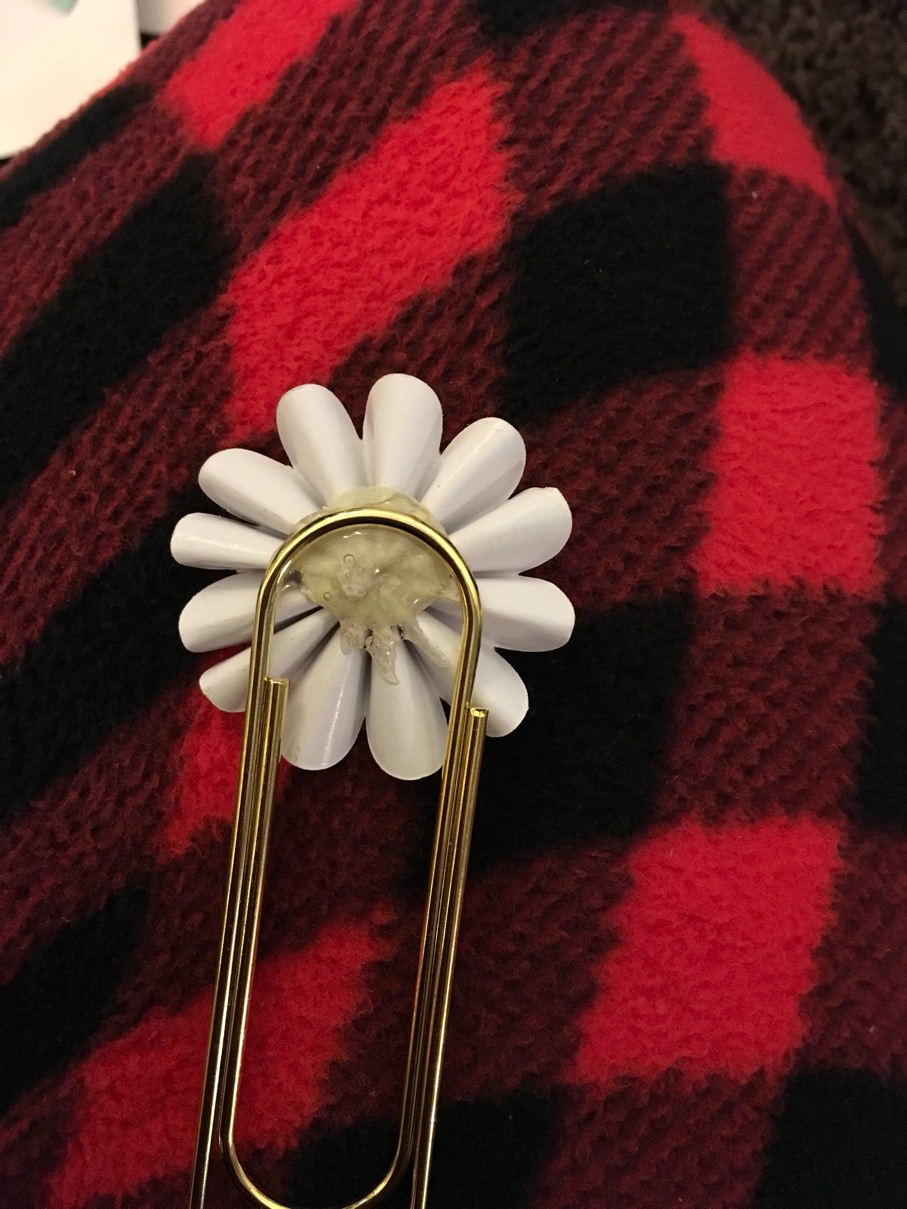
Then add a small cut out of felt to cover up the ugly! 

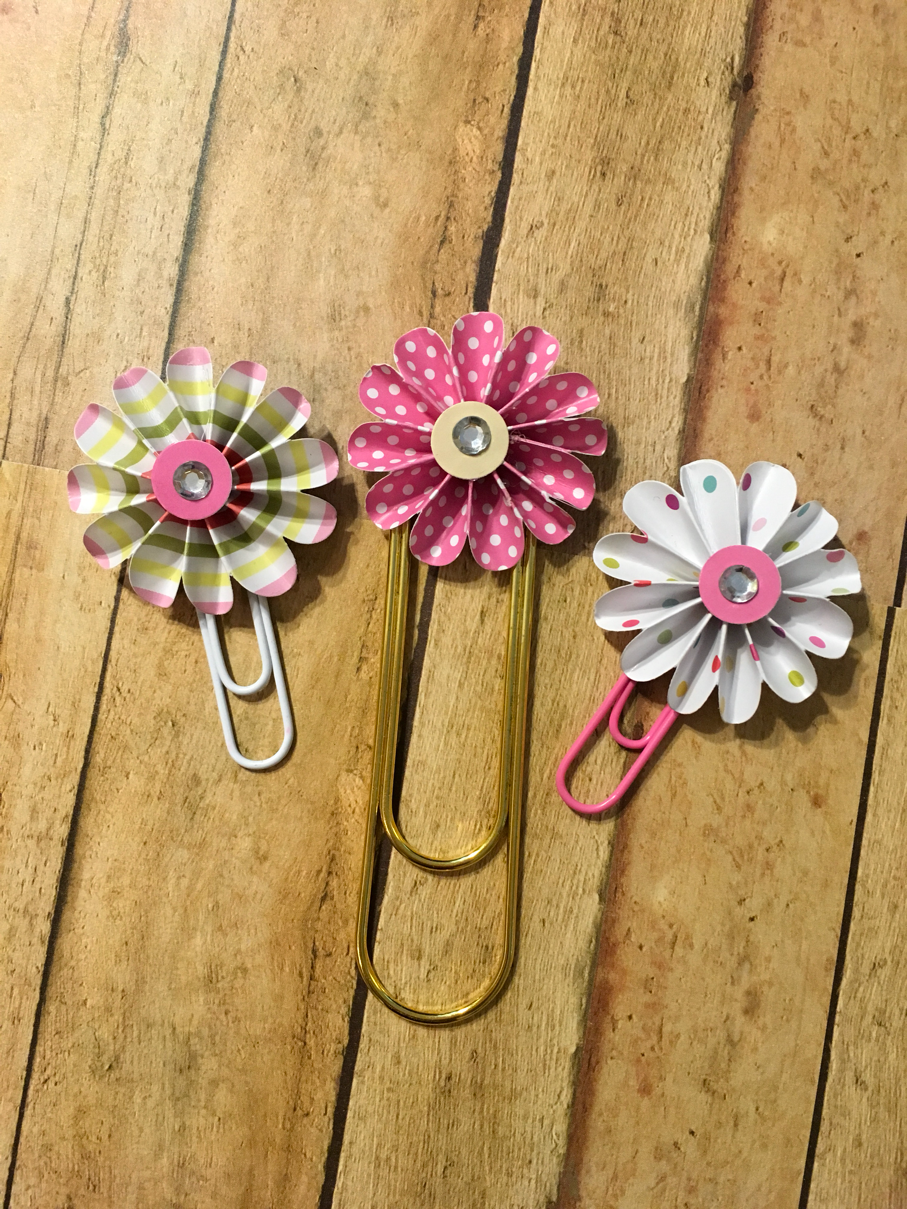
 Finish off the other rosettes the same way and you can even add some smaller clips to make more of a variation and really could these be any cuter? 

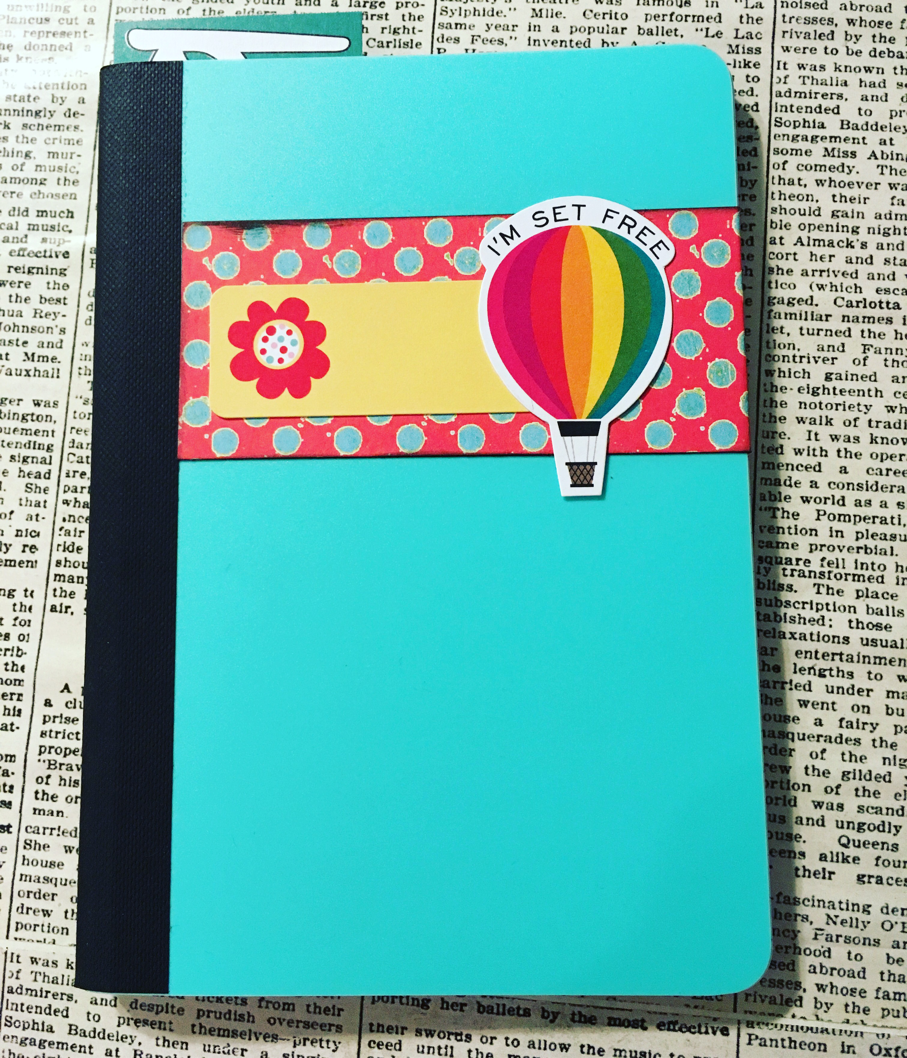
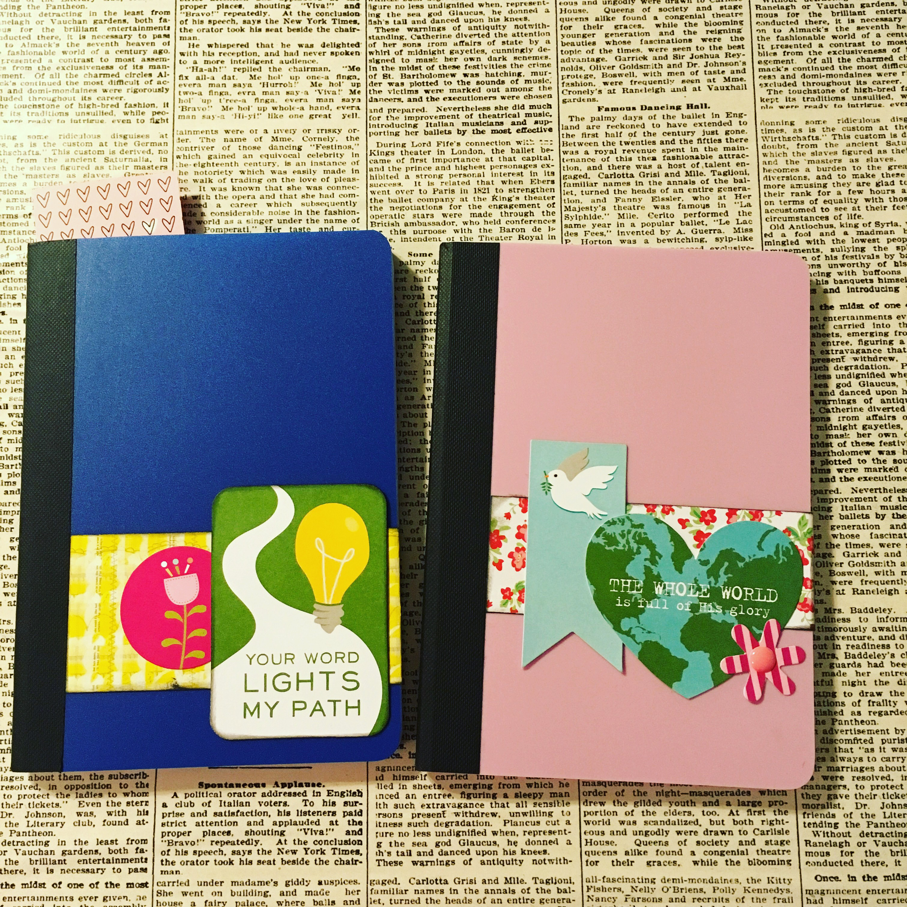
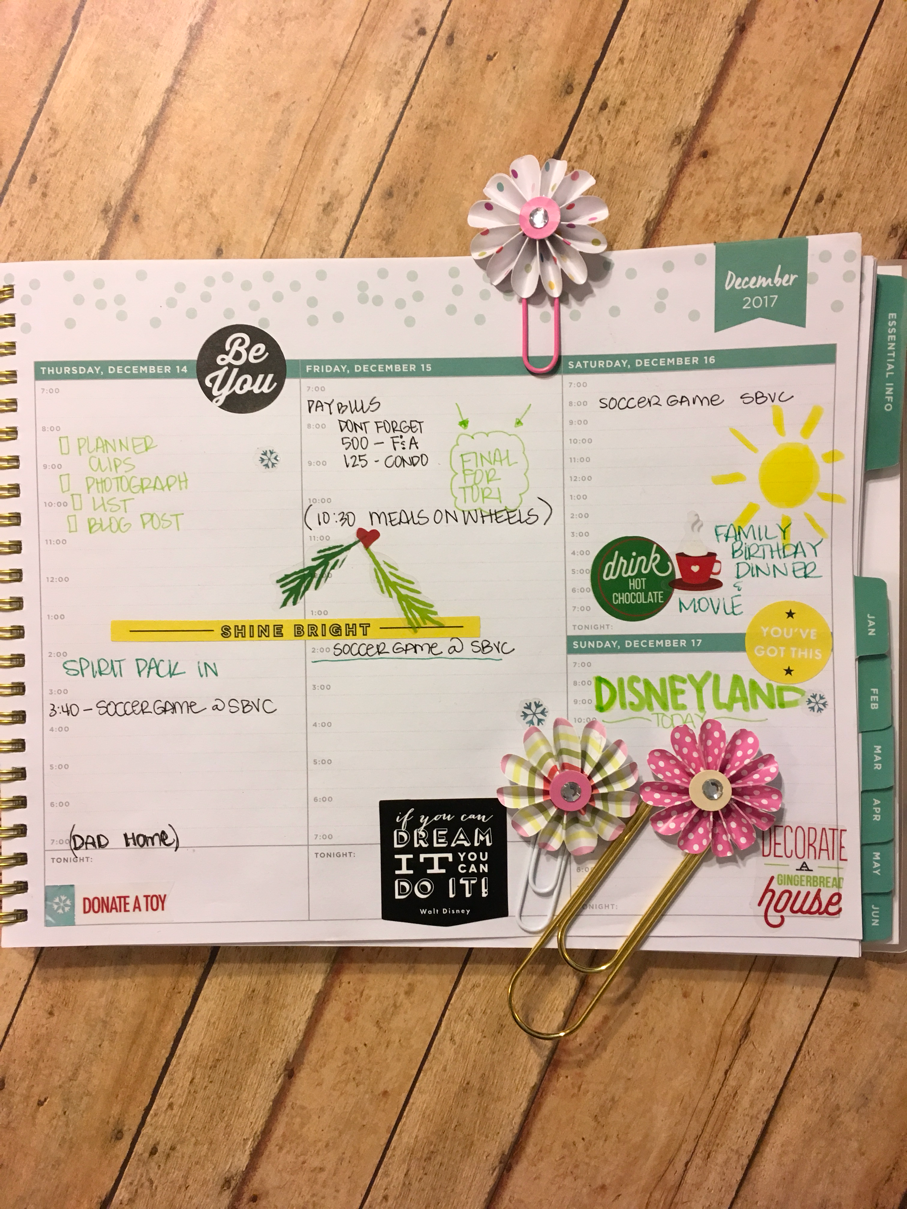
 And in case your wondering how they look in a planner - they look fabulous!!! 


Wouldn’t these make a fun gift or even a hostess gift at your next craft party. Let me know if you try it out!

Happy crafting 
xoT

Tuesday, December 12, 2017

Oh Christmas Tree

Hi again, I took a much needed break from crafting after my last show of the season.
Birthdays in our house....

This year we told our girls (14 & 16) that they could choose money or gifts for their birthday. My youngest daughter chose money and wanted to go to Melrose in Hollywood to do some shopping. My oldest daughter decided she wanted presents. She also asked for something fancy as a centerpiece for her party table. 

I had been seeing some fun ideas on line and the one that caught my eye was customizing clear christmas ornaments with paint. So my next obstacle was finding a tree - small enough and cute enough to put in the center of her table.

I found a small white tree at the 99 cent store and then started to look for clear ornaments - they had plenty of the big 4 inch ornies at the dollar tree and some smaller ones at michaels and while that probably would have looked ok - I wanted something smaller and low and behold on a recent trip to Walmart I found the cutest tiny embellished ornaments - they were embossed with silver accents.

Here are the ingredients for the cutest little ornie you ever will make

The cool thing about this idea is that you can customize these ornies to any color scheme or for any celebration

First step - is to squeeze some  acrylic paint into the ornie - then swirl the ornament around to move the paint...


 then pour the extra into a small cup..let it drain upside down on a plate

and continue on with the other colors 
p.s. the paint bottles were 50 cents at Walmart also


and look how pretty when they are done...I think the silver accents really make them look vintage and more fun.


while the lighting is not to good--- here is the finished ornaments on the tree


and another up close shot of the tree...I added some super soft and squishy little characters that my daughter loves to collect.


another shot in a bit better light

oh and in case you were wondering if she liked it 


She LOVED it!

Share if you make some ornaments similar to these..

Happy Crafting
xoT


Thursday, November 16, 2017

2017 Ornament Exchange


Welcome to the 2017 Ornament Exchange & Blog Hop! This year, there are 47 amazing bloggers participating in the exchange. The rules of the challenge were simple: be partnered with a fellow blogger, create a handmade ornament for $15 or under, create a tutorial, and ship the ornament off to a new home!

Here is the important information for the exchange and all the players - if you have a moment take a quick look and leave some happy love for all the crafty makers.

Happy holidays
2017 Ornament Exchange and Blog Hop

Meet the 2017 Ornament Exchange Hosts

Shirley · Intelligent Domesticatons Michelle · Our Crafty Mom
Beverly · Across the Blvd. Christene · Key to Inspiration Pili ⋅ My Sweet Things
Trisha · Rosewood and Grace Jeanie · Create and Babble Katrin ⋅ Kreativ K
Pamela · Home On The Corner Lorelai Life with Lorelai Cindy ⋅ DIY Beautify
Debbie ⋅ Tweak and Style Stephanie ⋅ Swoodson Says Chelc ⋅ Inside the Fox Den
Vicki and Jenn ⋅ 2 Bees in a Pod Joanne ⋅ Our Unschooling Journey
Tylynn ⋅ Bitterroot DIY Sam ⋅ Raggedity Bits Mary ⋅ The Boondocks Blog
Samantha ⋅ Little Bits of Home Hope ⋅ Hopes Crafty Niche Anne ⋅ Orange Bettie

Hey there - My partner for this exchange was the wonderful Debra over at Shoppe No 5 - shoppeno5.com - she is a crafty girl and does awesome upcycled furniture makeovers - I sent her the above snowman ornament and she sent me a cute handmade ornament made using a clay pot - wait till you see it...


This is my first year participating in this swap and boy are there a lot of us involved. It’s kind of a big deal!

We were  paired off with partners and were to make an ornament and share the tutorial on how to make the ornament we were  sending about partner. 

Wait till the end to see the finished ornament - pretty please!

So I started with paperclay and a styrofoam ball the size is up to you - these balls can come as big as 5 inches. I chose the 2 inch ball 


I use water and my palms to flatten out some clay and then spread it into the ball, the texture helps keep the clay in place, and keep  adding clay to cover the ball until it’s nice and even.

I added small balls of clay for cheeks and again use water to smooth out the lumps and make them look like they belong. I used more clay to add the nose and pulled on it to stretch it out some. Then I used a toothpick to make a crooked smile.

It takes around 24 hours to dry - i put my snowman head on a skewer so it dries all the way around. Once it dries use acrylic paint to add the face and details - as you can see from above I changed his smile and used dots instead —

Then decorate to your hearts content. I have made hats out of paper before or use a store bought snowman hat (Joanne’s carry them) I made mine out of felt. Seriously no sewing just cut out a circle for the bottom, a rectangle for the tube and glue closed and then a smaller circle for the top-easy peasy! 

Ha-isn’t he cute!!! Imagine the possibilities - the different hats the decorations or collars... here’s hoping my partner enjoyed her ornament. Let me know if you make one of these  and tag me in the photos on Instagram @onecraftymess


Here is the awesome cottage I received from Debra - isn't it the sweetest thing ever.


FIND ALL 47 HANDMADE ORNAMENT TUTORIALS BELOW AND SHARE YOURS TOO! Use Hashtag #2017OrnamentExchange so we can see your creations on social media.


Wednesday, October 25, 2017

Craft Show signage - TUTORIAL

Nothing like waiting until the last minute for making things for my craft show.

So last year I wanted to make a magnet board that would fit on my table so we went shopping and  we bought all these pieces at Lowe’s.


The circular piece is in the building section - it’s used for making side tables - then one 2 x 4 and a hinge and a hook. The one thing we couldn’t find was the right sized metal sheeting to cover this circle. I tried buying that roll of stickable magnet but that wasn’t the right size either so it sat unused all year. 


So since it can stand up I thought I would make a sign for my craft show booth. I painted the circle with chalkboard paint - and then added some painted elements around the outer part - I did that so there would be permanent color on the piece. 


For rest of the sign I used chalk. Mostly because I wasn’t sure about my writing but once it was done I had wished I used paint...the main reason I wanted to use chalk was because I wanted to be able to add different Holiday emblems for each show I was participating in...all in all - I’m in love! 

Let me know what you think 

Happy Hump Day 
T

Tuesday, October 3, 2017

NEW Photo Mailers

Most crafters can make something out of anything. Which is where this idea came from.

Awhile back I made this mini folded album out of a 6 x 12 sheet of paper...I had tried to make a fun velcro closure and used the stickie kind. Well it never really adhered - it was meant to easily open and close and when it kept sticking well I gave up. The paper was cute and the paper was fun but I hadn't figured out how to keep it closed.

That was last year. Fast forward to recently...like a month ago. I had sheets of 6 x 12 paper from other paper bag albums and wanted to try making one of those albums again - well guess what I figured it all out. 

Here are the NEW version of the old idea I had. 
I used left over papers from the Echo Park Bundle of Joy kit and made what I am now calling

PHOTO MAILERS


Here is the MAILER opened up once


Here is the mailer opened up twice.
I added more cardstock for the photo mats and used some die cuts & stickers from the kit to add the accents and embellish the inside photo mats.


Oh and how incredible easy was it to figure out this closure. Sometimes we crafters make things super hard - when the easiest way is usually the BEST way. 

Extra paper folded around the closed mailer to make a simple slip on and off belly band.

EASY!!!!!


Part of the reason for making these small photo mailers is that I like to have small priced items at my craft show - for people or even kids who don't have much to spend but still love giving handmade gifts. I have found selling at craft shows over the years that you should always have lots of different but similar items at varied price ranges to accommodate all your buyers. Just  a TIP!


Thanks for stopping by. 
this is my busy craft prep season so forgive the in and out of posting here on the old blog.

Ciao Tina


Tuesday, August 22, 2017

Junk journaling my Way

Not sure if you have seen any of the super cool junk journal makers on YouTube but you should check them out! I love the idea of them mostly because it'sANYTHING  GOES -  I like that you can use anything you want to make it look old, themed, and it's ok that they are super fat and filled up!!! 

I have made these in the past and painted pages and added a bunch of different things to them - I'll search one out and share it here when I do. 

So because I love new ideas and I especially like to make them my own I decided to try this with my traditional paper bag albums as the base.

Here is one version I made and it has an uplifting and personal inspirational theme to it. 

See the cover looks like any other paper bag album. 

But then when you open it - its  filled with so much more. Lots of extras 


I used small bags, envelopes and vintage papers to create inner booklets and holders to hold special secret notes to yourself or words and photos that are extra special to you and maybe for your eyes only. 


And I added a bunch of 3x5 journal cards with positive messages and lots of space for journaling in other spots. The smaller hand sewn booklets inside have little surprises all over,'it's quite fun to flip through these. 


These inner books are made of scrapbook paper, journal tags, and vintage paper and are held in the album with bakers twine!!

I just posted a video up on YouTube (@onecraftymess) on a journal I made for my trip to Tennessee before it was filled in and another video with ideas on what to collect on your trips to add to your junk journal when you get home!

Next will be the finished travel journal with all my goodies added and it's quite full and super fun for all to flip through!!! 

Happy Tuesday ya'll 

xo
T

Thursday, August 17, 2017

Sale in the shop

Just wanted to take a minute and share that I have some albums on sale right now in the shop and if you mention that you are shopping by way of the blog - I will give you free shipping  on any purchase so if you have been wanting something - now is the time to load up and buy buy buy 

Check out the newly listed goods 


In time for Halloween


Cute right?

Check out the shop for all the photos of the inside of the albums. 


Hope your having a great week!!!

xo

Saturday, August 5, 2017

Birthday #47

Wednesday August 2nd I turned 47. It's a big number for me since I'm a few years I will be 50! I look at myself in the mirror and don't see a almost 50 year old girl.  Weird this time thing - it keeps On going even if you aren't ready for it.


I know I look a little less then happy here but if I'm being honest - I wasn't feeling super special on my birthday! I woke up restless like I hadn't slept! I had to get my kids ready for high school registration then went to have breakfast with the kids and then a movie then home and we'll it felt a little less then spectacular!! When my hubbs got home  he took us out to dinner and wouldn't you know I forgot my phone!! 

You might be saying well that sounds like a good day but i realized later that I was missing my mama - she was always the first to call me on my birthday, really early, and sing happy birthday in English and Spanish. For some reason this year (she past away in 2009) I missed her most or needed to hear her most! 


My birthday celebrating Saturday July 29th - with dinner with my dad and brother and we went out on Sunday to Venice beach and did the whole Los Angeles thing and we had the best day!! Really I had a fantastic birthday week!!! 

I am blessed and decided to make number 47 a fantastic year - I have blog goals, fitness goals and personal growth goals!!! I'll share those later! But I need to prepare mentally for 50 and I plan on staring this year!!! 

Stay tuned and I guess the moral of this post is --- if you are feeling crappy figure out the real reason because there is always an underlying reason to your sadness and if you do t figure it out it could affect your whole day and put a damper on it!!! For me I was just missing my mom- and it wasn't until nighttime that I realised it and let it go!!!! 


Have a great weekend friends!!! Here's to 47 🎂


Saturday, July 29, 2017

Bible journals

I wanted to share this idea I came up with that can be altered for any subject - BIBLE JOURNALS 

All you need to make them is a blank notebook and some scraps of paper and some die cuts from paper kits 

I used papers and embellishments from illustrated faith 


Cute and simple and because it's a notebook and has lined paper inside you can do bullet journaling of your scriptures and or readings! 


These could be made for bible study groups or women's groups - next ill share the kids journals I made - same idea but with a  sweet images - 

I'll have these up in the shop on Monday!!! 

Happy Saturday ya'll!! 

xoT

Thursday, July 13, 2017

New albums

I just finished these awesome albums and they are now listed in the shop


You can see more photos on Instagram or in the shop 

I used some of the coolest NEW paper designs out there like 

TOYBOX by Carta Bella
GIRL SQUAD by Pebbles Inc.
FAMILY by Echo Park
YOU ARE LOVED by Illustrated Faith

Cuteness all around and they make great gifts.

Happy Crafting

XO
tina


Friday, June 30, 2017

for the love of Burlap

I have total love for Burlap - and if you have ever touched the stuff there is really alot not to like about it. It sheds when you cut into it and its rough to the touch but the colors it comes in are dreamy and I am extremely fond of making banners out of them - and truthfully not much touching going on with banners - just take them out and string them up...

Here are few I just made and listed in the shop and I took these photos with some of my sweet holiday gnomes.


aren't these banners fun and look how great they look with my Gnomes.

Check out my instagram feed for a video I shared of my mantel decorated with all the Fourth of July goodies I have made and yes they are for sale in my shop.

Hope your week has been a crafty one.

xo
T


Wednesday, June 7, 2017

Crafty Girl Ideas #2

Here is another episode of

CRAFTY GIRL IDEAS

If you know me and this here ol blog then you know I am an avid paper crafter more specifically a scrapbooker and with that skill - there are always left over paper scraps and embellishments from used kits. 

I usually make mini paper bag album kits to sell - so that you can make something at home in your own style - well I also like to make tags and add them to packages when I ship out purchases.
I made a quick video to show you what and how easy they are to make 

enjoy


We are in full summer mode here at Casa Curtis - all the kids are off and we are slowly filling are summer calendar up with fun things to do.

Happy Hump Day!!!

xo

Sunday, May 21, 2017

Faith

**This is a religious post - I hope not to offend anyone!**

I grew up in a catholic family. I went to church every Sunday with my parents and went to Sunday School after words and my mom was the teacher. We did alot at our church it was a regular thing. It's all I knew. 
I went to catholic school for my entire education 12 years. Grew up with all the religious expectations that are bestowed upon us through Catholicism. It was my life. 
But once I grew up and moved out of the house. I didn't "HAVE" to go anymore. It was my choice.
In my 20's it didn't really fit in. I had a son at 21 and he was less then well behaved. So, I never wanted to inconvenience those that wanted to be at church. So I stopped going.

I would always go when my mom made a special request for my family to attend. Mother's Day, Easter and Christmas. I went for her. 

Over the years I have always thought about going back but again it doesn't seem to fit in. We have 4 kids and something seems to be going on ALL the time. Excuses I know but its all I got. 

Now a days, it's split. My husband will go with me if I ask. My oldest daughter wants to go, my middle daughter has no desire to go and my youngest son is not interested either way, or he will go if he can bring his phone and his earphones and watch videos during mass...that's not happening. So you see - split....

Lately, I have been feeling a pull towards my Faith again. I recently bought a journaling bible and have started to read the bible again. It feels weird. Like I am doing something that doesn't feel natural. I just think it is something I have to ease back into. 

I am a paper crafter as I am sure you are aware of (if you read this here ol'blog of mine)
I recently bought this awesome paper kit by @IllustratedFaith and it is amazing. The graphics and the designs are so cheerful and colorful and the images are all faith based and it rang something inside me and got me excited - 

i created these 2 Bible bookmarks using the papers and embellishments 


See aren't they super cute?


wouldn't be bad to look at while reading in your bible right?

I am going to be listing these in the shop tonight.

Here's to my Faith and finding my way back..

Thanks for stopping by.
XO

Wednesday, May 17, 2017

It's a New Month

Wow - its been awhile since the last time I posted. Where did the time go? Last time I shared a trip I had just taken with my girlfriends. A week later I went on another trip with my husband to Nashville, Tennessee. It was Literally a weekend trip and it was so fun and jam packed with sight seeing. I will share more photos of that trip soon.

I wanted to share some of my newest little creations. My GNOMES.

I am obsessed - as I am sure I have shared before - but these little guys are the cutest little things ever.

So these are my RALLY GNOMES
I made this set with Dodger and Angel fabric and added some cute little baseballs on the their caps.


And because I wanted to make sure I didn't leave any sports fan out - Here are some more 
this time its soccer and basketball Gnomes...
LOVE LOVE...


I am also making them for other Holidays - currently just finishing up the 
Patriotic/Americana
4th of July GNOMES>

I am just so happy with the way they came out!


Here is a close up of the fabric for the Americana Gnomes


In case you want to add to your home decor or want a fun gift idea - these are all up in the shop right now.

Visit onecraftymess.com and click on the shop link at the top.

Happy Wednesday folks.


Monday, April 17, 2017

A girls trip

Indulge me for a bit - I want to share a trip I recently took-- like I just got home on Saturday...but while it was a girls trip this post isn't about my friends (they are pretty great girls) but this is more about the beauty and architecture of SEATTLE


These are the girls I went with 


arriving in Seattle - it was raining - LOVED that....


Pioneer Square


The art on the street walls - is ALWAYS amazing


Never visit Seattle without going to Pikes Place Market
 it screams SEATTLE plus its a feast for the senses for sure.


The signs are even awesome - Art in itself


The people are so welcoming - this was one of the fish mongers
Mr. Hogue  - lovely fellow


Awesome little shop called Live Color right across from 
Pikes Place - and they offer 4.00 beers - great place to stop and refreh - 


An early dinner at Lowe's 
Clam Chowder Bowl, shrimp cocktail and BEER
Yummmmm


This place was a bar that is incorporated into an old hotel and I wanted to go in and have a drink but instead we just walked past it....wah wah wah


The view from the top of the Space Needle


A view from the bottom of the space needle


A view from the front of the Chihuly Garden looking up at the Space Needle at night
Gorgeous


Night gossip session starts with food - beer 
cheese curds, salami,  crackers and veggies...
Deliciousness


If you know me I am all about shock value
I love making people laugh and this shirt was funny, crass but totally true
it does rain there ALOT.


Fremont Troll
How cool is this ginormous piece of art.


And the under part of the bridge above the troll 
I mean isn't this stunning


Inside the Chihuly terranium looking up at the Space Needle


I love old trees and when they are nicely propped up inside an art glass exhibit well
 its a tin'g of Beauty!
(said with a grumpy boston accent like Mickey from Rocky movies)


Best part of hanging out with my girl friends is trying NEW foods 
and actually this was my pick
HOT POT SOUP served with spicy meat and veggies


I've always turned my nose up at Boba so I tried the milk honey tea with boba and it was yummy. 
I am not a fan of the chewy boba in every sip but I love the flavor of the tea for sure. 
I will definitely try it again.


This was way to spicy for me - I ate some but I think next time I will do more meat and less spice...but it was definitely worth the try.


This is as close as I got to the field - I was hoping to make a game but no one was interested.
Oh well...


On our final night we went and walked the waterfront and I took this photo off the pier right around sunset - isn't it amazing?
 I could live here if given the chance...I love the cold, the rain and the beauty of this city.


This is a shot of the beautiful skyline I took as we were heading out to the airport to leave. 

Until next time SEATTLE - I will truly miss you.


Thanks for letting me share my trip and show you the beauty of this city through my lens.

Hope you had a beautiful Easter.

xo